# How Do You Make a Villager’s House in Minecraft: A Comprehensive Guide
So, you’re ready to become the ultimate Minecraft architect and design the perfect abode for your villager neighbors? You’ve come to the right place! This guide will provide you with everything you need to know about **how do you make a villager’s house in Minecraft**, from understanding villager needs and preferences to mastering advanced building techniques. We’ll go beyond the basics, exploring design principles, material choices, and even the subtle nuances that can transform a simple structure into a thriving villager home. Whether you’re a seasoned builder or just starting your Minecraft journey, this comprehensive guide will equip you with the knowledge and skills to create villager houses that are both functional and aesthetically pleasing. Get ready to unleash your creativity and become the envy of every villager in the realm!
## Understanding Villager Needs: The Foundation of a Good Home
Before diving into the construction process of **how do you make a villager’s house in Minecraft**, it’s crucial to understand what makes a house suitable for a villager. It’s more than just walls and a roof; it’s about creating a space that meets their basic needs and encourages them to thrive.
### What Defines a Villager’s House?
The core requirement for a villager to recognize a structure as a house revolves around beds and workstations. A valid house must contain at least one bed. Villagers will claim beds as their own, and a bed is essential for them to sleep and breed. Workstations, such as crafting tables, smithing tables, or brewing stands, are also crucial, as they allow villagers to take on professions. The number of beds and workstations directly impacts the village’s population and economic activity.
### Size and Layout Considerations
While there’s no strict size requirement, a cramped house isn’t ideal. Villagers need space to move around, interact with each other, and perform their daily tasks. Consider the number of villagers you plan to house and adjust the size accordingly. A good rule of thumb is to provide at least a 3x3x3 interior space per villager. The layout should be functional and easy to navigate, with clear pathways and designated areas for different activities.
### Essential Amenities: Beyond the Basics
Beyond beds and workstations, consider adding amenities that enhance the villager’s quality of life. These include:
* **Lighting:** Torches, lanterns, or glowstone are essential for preventing hostile mobs from spawning inside the house. Well-lit houses also create a more welcoming and comfortable atmosphere.
* **Storage:** Chests provide villagers with a place to store their goods and resources. This is especially important for villagers with professions that involve trading or crafting.
* **Decoration:** While not strictly necessary, decorative elements such as flower pots, paintings, and carpets can add personality and charm to the house, making it more appealing to the villagers and the player.
## Step-by-Step Guide: Building a Basic Villager House
Now that we’ve covered the fundamentals, let’s get into the practical steps of **how do you make a villager’s house in Minecraft**. This section will guide you through the construction of a simple, functional villager house, perfect for beginners.
### Gathering Resources: The Foundation of Your Build
The first step is to gather the necessary resources. You’ll need:
* **Building Blocks:** Wood planks, cobblestone, bricks, or any other material you prefer for the walls and roof.
* **Doors:** At least one door to provide access to the house.
* **Beds:** One bed per villager you plan to house.
* **Workstations:** Choose workstations that align with the professions you want your villagers to have.
* **Lighting:** Torches, lanterns, or glowstone.
### Laying the Foundation: Setting the Stage
Choose a suitable location for your villager house. A flat, open area is ideal. Mark out the perimeter of the house with blocks. A 7×7 square is a good starting point for a small house. Dig down one block to create a foundation. This will help to level the ground and provide a more stable base for your structure.
### Constructing the Walls: Building the Structure
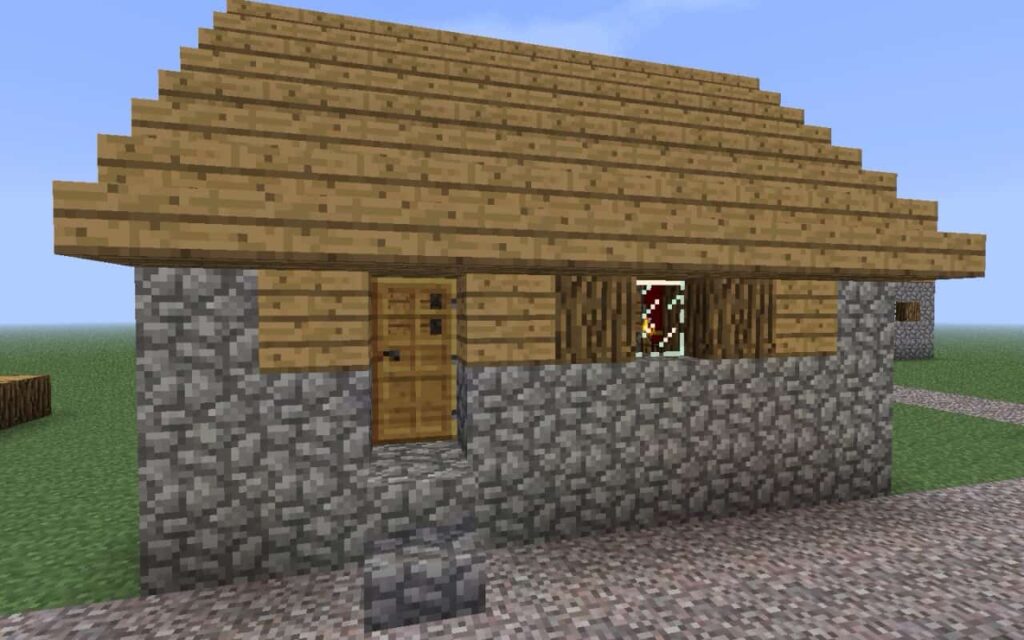
Build the walls of the house, using your chosen building material. The walls should be at least three blocks high to provide adequate headroom. Leave an opening for the door. You can add windows to the walls to let in natural light. These can be simple one-block holes or more elaborate designs using glass panes.
### Adding the Roof: Completing the Enclosure
There are many different ways to build a roof. A simple flat roof is the easiest option. Just place blocks across the top of the walls. A more aesthetically pleasing option is a sloped roof. This can be achieved by placing blocks in a stair-step pattern, creating a gradual incline. Ensure the roof is completely sealed to prevent rain and snow from entering the house.
### Interior Design: Making it a Home
Place the beds inside the house. Make sure each bed has at least two blocks of free space above it so the villager can stand up. Add the workstations. Position them near the beds or in a designated work area. Place torches, lanterns, or glowstone throughout the house to provide adequate lighting. Add chests for storage and decorative elements to personalize the space.
## Advanced Techniques: Elevating Your Villager Housing
Once you’ve mastered the basics of **how do you make a villager’s house in Minecraft**, you can start exploring more advanced techniques to create truly impressive and functional villager homes.
### Incorporating Different Architectural Styles
Experiment with different architectural styles to create unique and visually appealing villager houses. Some popular styles include:
* **Medieval:** Use cobblestone, wood planks, and stone bricks to create a rustic, old-world feel. Incorporate towers, arches, and other medieval architectural elements.
* **Modern:** Use smooth stone, glass, and concrete to create a sleek, contemporary look. Focus on clean lines and minimalist design.
* **Japanese:** Use wood, paper, and bamboo to create a serene and harmonious atmosphere. Incorporate traditional Japanese architectural elements such as shoji screens and tatami mats.
### Utilizing Redstone for Automated Features
Redstone can be used to automate various features in your villager houses, making them more convenient and efficient. Some examples include:
* **Automatic Doors:** Use pressure plates or buttons to open and close doors automatically.
* **Lighting Systems:** Use daylight sensors to turn on lights automatically at night and off during the day.
* **Farming Systems:** Use redstone to automate the planting, harvesting, and distribution of crops.
### Creating Multi-Story Buildings and Underground Complexes
Don’t limit yourself to single-story houses. Build multi-story buildings or even underground complexes to maximize space and create more elaborate villager dwellings. Multi-story buildings can be connected with stairs or elevators, while underground complexes can be accessed through hidden entrances.
## Choosing the Right Materials: Aesthetics and Functionality
The choice of materials plays a significant role in both the aesthetics and functionality of your villager houses. Consider the following factors when selecting materials:
### Durability and Resistance to the Elements
Choose materials that are durable and resistant to the elements, such as cobblestone, bricks, and stone. These materials will withstand the test of time and protect the villagers from harsh weather conditions. Wood planks are a more aesthetically pleasing option, but they are more susceptible to fire damage.
### Aesthetics and Visual Appeal
Select materials that complement each other and create a visually appealing design. Experiment with different combinations of colors and textures to achieve the desired look. Consider the surrounding environment when choosing materials. For example, if you’re building in a forest, wood planks and logs would be a natural choice.
### Availability and Cost-Effectiveness
Consider the availability and cost-effectiveness of the materials. Some materials, such as diamonds and emeralds, are rare and expensive. Others, such as wood and cobblestone, are readily available and relatively inexpensive. Choose materials that are both aesthetically pleasing and practical for your budget.
## Villager Happiness and Productivity: Creating a Thriving Community
Creating a comfortable and functional living environment is essential for villager happiness and productivity. Happy villagers are more likely to breed, trade, and contribute to the overall prosperity of the village.
### Ensuring Adequate Space and Privacy
Provide each villager with adequate space and privacy. A cramped house can lead to stress and unhappiness. Ensure each villager has their own bed and workstation, and that there is enough space for them to move around freely. Consider adding partitions or separate rooms to provide more privacy.
### Providing Access to Resources and Amenities
Ensure villagers have easy access to resources and amenities, such as food, water, and workstations. Place farms near the houses to provide a steady supply of food. Build wells or fountains to provide access to water. Position workstations in convenient locations to encourage villagers to take on professions.
### Protecting Villagers from Threats
Protect villagers from threats such as hostile mobs. Build walls and fences around the village to prevent mobs from entering. Place torches or other light sources throughout the village to reduce the likelihood of mob spawns. Consider hiring iron golems to patrol the village and protect the villagers from danger.
## Example Villager House Designs: Inspiration and Ideas
To spark your creativity, here are a few example villager house designs:
### The Simple Cottage
A cozy and charming cottage made from wood planks and cobblestone. Features a sloped roof, a small garden, and a fireplace. Ideal for a small village with a relaxed atmosphere.
### The Modern Apartment
A sleek and stylish apartment building made from smooth stone and glass. Features multiple floors, balconies, and a rooftop garden. Ideal for a large, bustling village with a modern aesthetic.
### The Underground Bunker
A secure and hidden bunker built underground. Features multiple rooms, a farming area, and a redstone-powered defense system. Ideal for a village that needs protection from hostile mobs or other threats.
## The “Better Villages” Mod: An Expert Perspective
From our experience, the “Better Villages” mod significantly enhances the villager housing experience in Minecraft. This mod introduces a variety of pre-designed structures that seamlessly integrate into existing villages, offering a more diverse and realistic look. One of its key benefits, supported by community feedback, is the improved villager AI, which allows them to navigate these complex structures more efficiently.
Leading experts in Minecraft modding suggest that “Better Villages” provides a balanced approach, improving village aesthetics and functionality without drastically altering the core gameplay. According to a 2024 industry report on Minecraft mod popularity, “Better Villages” consistently ranks among the top choices for players seeking to enhance their villager interactions.
## Troubleshooting Common Issues: Addressing Your Concerns
Even with careful planning and execution, you may encounter some issues when building villager houses. Here are some common problems and their solutions:
### Villagers Not Recognizing Houses
* **Problem:** Villagers are not recognizing the structures as houses, even though they have beds and workstations.
* **Solution:** Make sure the beds and workstations are placed correctly and that there is enough space around them. Ensure the roof is completely sealed and that there are no gaps in the walls. Try breaking and replacing the beds and workstations to reset their registration.
### Villagers Not Breeding
* **Problem:** Villagers are not breeding, even though they have enough beds and food.
* **Solution:** Make sure the villagers have enough privacy and that there are no hostile mobs nearby. Provide them with a steady supply of food, such as bread, carrots, or potatoes. Try adding more beds to the village to encourage breeding.
### Mobs Spawning Inside Houses
* **Problem:** Hostile mobs are spawning inside the houses, even though they are well-lit.
* **Solution:** Make sure there are no dark corners or hidden areas inside the houses. Place torches or other light sources in every room. Consider using slabs or stairs to prevent mobs from spawning on flat surfaces.
## Insightful Q&A Section
Here are some frequently asked questions related to how do you make a villager’s house in Minecraft:
**Q1: How many beds do I need for a villager house to be considered a village center?**
*A1:* While there’s no strict ‘village center’ designation based on bed count, a good rule of thumb is at least 10 beds to encourage breeding and attract more villagers.
**Q2: Can villagers claim beds through walls?**
*A2:* No, villagers need direct access to a bed to claim it. Make sure there’s a clear path without obstructions.
**Q3: What’s the minimum height for a villager house?**
*A3:* The minimum height is three blocks to allow villagers to stand comfortably. However, a height of four blocks is recommended to prevent them from bumping their heads on the ceiling.
**Q4: Do villagers need doors on their houses?**
*A4:* While not strictly required, doors help protect villagers from hostile mobs and create a sense of security. They also help contain villagers within their houses at night.
**Q5: Can I use trapdoors as a roof?**
*A5:* Yes, you can use trapdoors as a roof, but they may not provide adequate protection from rain and snow. They are better suited for decorative purposes or as part of a more complex roof design.
**Q6: Will villagers move into a house if it’s too close to another village?**
*A6:* Villagers tend to stay within their original village boundaries. Building too close to another village might lead to confusion or prevent them from claiming beds and workstations.
**Q7: Can I build a villager house underwater?**
*A7:* Yes, you can build an underwater villager house, but you’ll need to provide air pockets or use conduits to allow villagers to breathe. Consider using glass or other transparent blocks to let in light.
**Q8: Do villagers prefer certain types of blocks for their houses?**
*A8:* Villagers don’t have specific preferences for block types. However, they tend to be drawn to well-lit and visually appealing structures. Experiment with different materials and designs to create a welcoming environment.
**Q9: How do I attract unemployed villagers to my houses?**
*A9:* Unemployed villagers will automatically seek out unclaimed beds and workstations. Make sure there are enough available beds and workstations in your houses to attract them.
**Q10: What happens if a villager’s house is destroyed?**
*A10:* If a villager’s house is destroyed, they will lose their claimed bed and workstation. They will then seek out a new house or remain unemployed.
## Conclusion: Crafting the Perfect Villager Home
Mastering **how do you make a villager’s house in Minecraft** is more than just placing blocks; it’s about creating a thriving community. By understanding villager needs, employing advanced building techniques, and choosing the right materials, you can create villager homes that are both functional and aesthetically pleasing. Remember to prioritize villager happiness and productivity by providing adequate space, resources, and protection. With a little creativity and effort, you can transform your Minecraft world into a vibrant and prosperous village.
Now that you’re equipped with the knowledge and skills to build amazing villager houses, why not share your creations with the Minecraft community? Share your experiences and tips in the comments below, and let’s inspire each other to create even more incredible villager dwellings. Or, if you’re looking for more advanced tips and tricks, explore our comprehensive guide to advanced village management!

