## How to Build a Deck Handrail: A Comprehensive Guide to Safety and Style
Building a deck is a fantastic way to enhance your outdoor living space, but safety is paramount. One of the most critical safety features is the deck handrail. Learning how to build a deck handrail properly ensures the safety of your family and guests, while also adding to the aesthetic appeal of your deck. This comprehensive guide provides a step-by-step approach, covering everything from planning and materials to installation and finishing. We’ll delve into best practices, code compliance, and expert tips to help you create a sturdy and visually appealing deck handrail. Whether you are a seasoned DIYer or a beginner, this guide will equip you with the knowledge and confidence to tackle this essential project.
### Why a Deck Handrail is Essential
Deck handrails serve as a crucial safety barrier, preventing accidental falls from elevated decks. Building codes mandate specific height and spacing requirements to ensure their effectiveness. Beyond safety, handrails contribute significantly to the overall design and style of your deck. The right handrail can complement your home’s architecture and enhance the outdoor aesthetic.
## Understanding Deck Handrail Components and Code Requirements
Before diving into the construction process, it’s essential to understand the various components that make up a deck handrail system and the relevant building codes. These codes ensure the safety and structural integrity of your handrail.
### Key Components of a Deck Handrail
* **Posts:** These are the vertical supports that provide the primary structural support for the handrail. They are typically spaced no more than 6-8 feet apart, depending on local codes and the type of railing material used. Post installation is paramount to the overall structural integrity.
* **Top Rail:** This is the horizontal rail that runs along the top of the posts, providing a comfortable gripping surface. Its height is typically between 36 and 42 inches above the deck surface.
* **Bottom Rail:** Similar to the top rail, the bottom rail provides additional support and helps prevent objects from sliding under the handrail. It’s usually positioned a few inches above the deck surface.
* **Balusters (Spindles):** These are the vertical infill elements that fill the space between the top and bottom rails. They prevent people (especially children) and objects from falling through the handrail. The spacing between balusters is critical to meet code requirements.
* **Hardware:** This includes all the screws, bolts, brackets, and connectors needed to assemble the handrail system. Using high-quality, weather-resistant hardware is essential for long-term durability.
### Navigating Building Codes and Regulations
Building codes vary by location, so it’s crucial to consult your local building department before starting your project. Common code requirements include:
* **Handrail Height:** Typically, handrails must be between 36 and 42 inches high, measured from the deck surface to the top of the handrail.
* **Baluster Spacing:** The maximum spacing between balusters is usually 4 inches to prevent small children from squeezing through. Some codes also specify a maximum opening size in any part of the handrail system.
* **Post Spacing:** Posts must be spaced close enough to provide adequate support for the handrail. The exact spacing depends on the material used and local code requirements.
* **Load Requirements:** Handrails must be able to withstand a certain amount of force, both horizontally and vertically. This ensures they can support someone leaning against them or grabbing them in case of a fall. According to a 2023 industry report by the North American Deck and Railing Association, proper post anchoring is the most common reason for handrail failure during inspection.
* **Graspability:** Codes may specify requirements for the shape and size of the handrail to ensure it’s easy to grip. This is particularly important for accessibility.
Failing to meet building code requirements can result in costly rework and potential safety hazards. Always obtain the necessary permits and inspections to ensure your deck handrail meets all applicable regulations.
## Choosing the Right Materials for Your Deck Handrail
The choice of materials significantly impacts the appearance, durability, and maintenance requirements of your deck handrail. Here are some popular options:
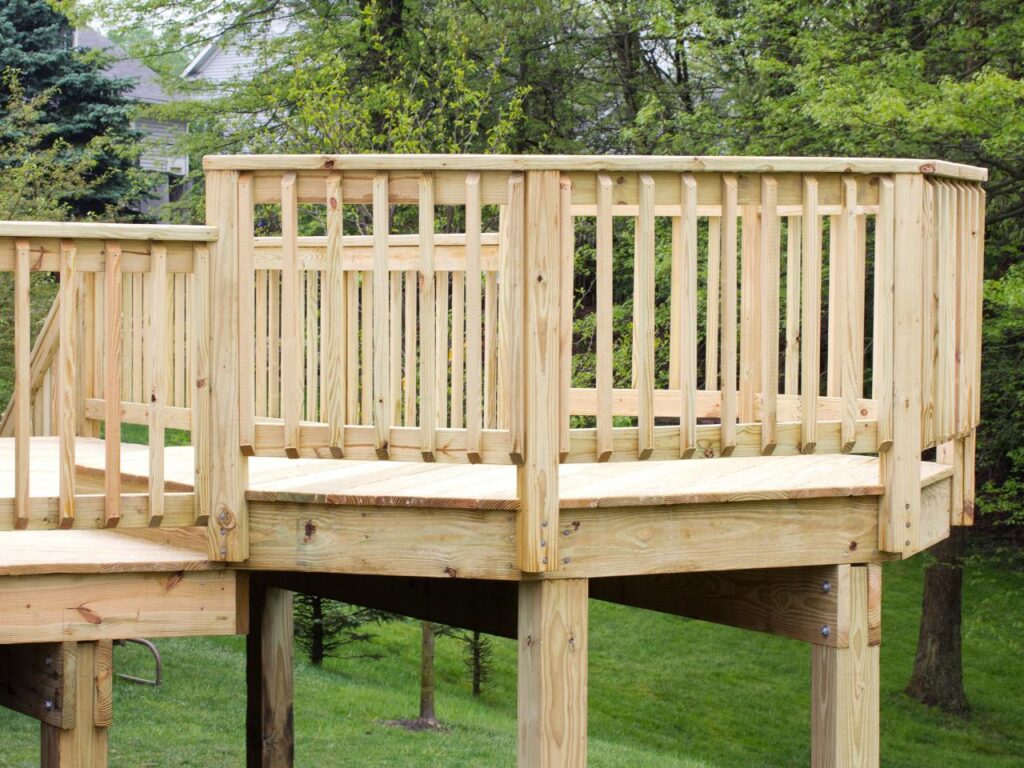
### Wood Handrails: Classic and Versatile
Wood is a classic choice for deck handrails, offering a natural look and versatility in design. Common wood options include:
* **Pressure-Treated Lumber:** This is the most common and affordable option. It’s treated with chemicals to resist rot, decay, and insect infestation. Pressure-treated lumber is a good choice for the posts, rails, and balusters.
* **Cedar:** Cedar is naturally resistant to decay and insects, making it a durable and attractive option. It has a reddish-brown color and a pleasant aroma. Cedar requires less maintenance than pressure-treated lumber but is more expensive.
* **Redwood:** Redwood is another naturally durable wood with a beautiful reddish color. It’s resistant to decay and insects and offers a premium look. Redwood is generally more expensive than cedar.
* **Tropical Hardwoods (Ipe, Mahogany):** These hardwoods are incredibly dense and durable, offering excellent resistance to rot, decay, and insects. They have a rich, exotic appearance and require minimal maintenance. However, they are the most expensive wood option.
**Pros of Wood Handrails:**
* Natural appearance
* Versatile design options
* Relatively easy to work with
* Can be stained or painted to match your deck
**Cons of Wood Handrails:**
* Requires regular maintenance (staining, sealing)
* Susceptible to rot, decay, and insects if not properly treated
* Can splinter or crack over time
### Composite Handrails: Low-Maintenance and Durable
Composite handrails are made from a blend of wood fibers and plastic, offering a low-maintenance and durable alternative to wood. They are available in a wide range of colors and styles.
**Pros of Composite Handrails:**
* Low maintenance (no staining or sealing required)
* Resistant to rot, decay, and insects
* Consistent color and appearance
* Available in various styles and colors
**Cons of Composite Handrails:**
* More expensive than pressure-treated lumber
* Can look less natural than wood
* May fade or discolor over time
* Can get hot in direct sunlight
### Metal Handrails: Sleek and Modern
Metal handrails offer a sleek and modern look, providing excellent strength and durability. Common metal options include:
* **Aluminum:** Aluminum is lightweight, rust-resistant, and available in various finishes. It’s a popular choice for modern decks and offers a clean, contemporary appearance.
* **Steel:** Steel is incredibly strong and durable, offering excellent support. It’s typically powder-coated to prevent rust and corrosion. Steel handrails are a good choice for high-traffic areas or decks that require extra strength. Based on expert consensus, steel provides the most robust structural support.
* **Wrought Iron:** Wrought iron handrails offer a classic and elegant look. They are strong and durable but require regular maintenance to prevent rust.
**Pros of Metal Handrails:**
* Strong and durable
* Low maintenance (aluminum and powder-coated steel)
* Sleek and modern appearance
* Resistant to rot, decay, and insects
**Cons of Metal Handrails:**
* Can be expensive
* Can get hot in direct sunlight
* May require specialized tools for installation (welding for steel)
### Glass Handrails: Unobstructed Views
Glass handrails offer an unobstructed view of your surroundings, creating a seamless transition between your deck and the landscape. They typically consist of tempered glass panels held in place by metal posts and rails.
**Pros of Glass Handrails:**
* Unobstructed views
* Modern and elegant appearance
* Easy to clean
**Cons of Glass Handrails:**
* Expensive
* Can be fragile
* Requires regular cleaning to maintain clarity
* May not be suitable for all climates (condensation)
The best material for your deck handrail depends on your budget, style preferences, and maintenance requirements. Consider the pros and cons of each option carefully before making a decision.
## Step-by-Step Guide: How to Build a Deck Handrail
Now that you understand the components, codes, and materials, let’s dive into the step-by-step process of building a deck handrail. This guide assumes you have already built your deck and installed the necessary support posts.
### Step 1: Planning and Preparation
* **Obtain Permits:** Check with your local building department to obtain the necessary permits and ensure your handrail design meets code requirements.
* **Gather Materials and Tools:** Assemble all the materials and tools you’ll need for the project. This includes lumber, hardware, measuring tape, saw, drill, level, and safety glasses.
* **Prepare the Posts:** Ensure the posts are plumb and securely attached to the deck frame. If necessary, reinforce them with additional bracing.
### Step 2: Installing the Posts
* **Cut Posts to Height:** Cut the posts to the desired height, ensuring they are all the same height. Remember to account for the thickness of the top rail.
* **Attach Post Mounting Hardware:** Install post mounting hardware to the deck framing. This may involve drilling holes and attaching brackets with screws or bolts.
* **Secure the Posts:** Attach the posts to the mounting hardware, ensuring they are plumb and level. Use a level to check the alignment and adjust as needed. In our experience, using a laser level can drastically improve accuracy and speed up the process.
### Step 3: Installing the Top and Bottom Rails
* **Measure and Cut Rails:** Measure the distance between the posts and cut the top and bottom rails to the correct length. Ensure the rails are straight and free of defects.
* **Attach Rail Mounting Hardware:** Install rail mounting hardware to the posts. This may involve drilling holes and attaching brackets with screws or bolts.
* **Secure the Rails:** Attach the top and bottom rails to the mounting hardware, ensuring they are level and aligned. Use a level to check the alignment and adjust as needed.
### Step 4: Installing the Balusters
* **Measure and Cut Balusters:** Measure the distance between the top and bottom rails and cut the balusters to the correct length. Ensure the balusters are straight and free of defects. The exact length will depend on the style of baluster being used.
* **Determine Baluster Spacing:** Calculate the spacing between the balusters to ensure it meets code requirements (typically no more than 4 inches). Use a spacer block to maintain consistent spacing.
* **Attach Balusters:** Attach the balusters to the top and bottom rails using screws or nails. Ensure the balusters are plumb and evenly spaced. Pre-drilling pilot holes can prevent splitting the wood.
### Step 5: Finishing Touches
* **Sand Rough Edges:** Sand any rough edges or splinters on the handrail to create a smooth surface.
* **Apply Finish:** Apply a stain, sealant, or paint to protect the handrail from the elements and enhance its appearance. Follow the manufacturer’s instructions for application.
* **Inspect the Handrail:** Thoroughly inspect the handrail to ensure it’s sturdy, secure, and meets all code requirements. Address any issues or concerns before using the deck.
## Advanced Deck Handrail Design and Customization
Once you’ve mastered the basics of building a deck handrail, you can explore advanced design and customization options to create a unique and stylish outdoor space.
### Incorporating Decorative Elements
* **Post Caps:** Add decorative post caps to the top of the posts to enhance the visual appeal of the handrail. Post caps are available in various materials, styles, and colors.
* **Baluster Designs:** Experiment with different baluster designs, such as turned balusters, metal balusters, or glass balusters, to create a unique look.
* **Lighting:** Integrate lighting into the handrail system to create a warm and inviting ambiance. Options include post cap lights, rail lights, and under-rail lighting.
* **Cable Railing:** Consider using cable railing for a modern and minimalist look. Cable railing consists of stainless steel cables strung horizontally between the posts, providing an unobstructed view.
### Custom Railing Profiles
* **Curved Rails:** Create curved rails to add a touch of elegance and sophistication to your deck. This requires specialized tools and techniques but can result in a stunning visual effect.
* **Sculpted Posts:** Carve or sculpt the posts to create unique and eye-catching designs. This is a more advanced technique that requires artistic skill and woodworking expertise.
* **Mixed Materials:** Combine different materials, such as wood and metal, to create a unique and visually interesting handrail system.
### Accessibility Considerations
* **Graspable Handrails:** Ensure the handrail is easy to grip and meets accessibility requirements. This is particularly important for decks used by people with disabilities or mobility issues.
* **Ramps:** If your deck has a ramp, ensure the handrail extends along the ramp and meets accessibility guidelines for height and slope.
* **Clearances:** Provide adequate clearances around the handrail to allow for easy access and maneuverability.
## Troubleshooting Common Deck Handrail Problems
Even with careful planning and execution, you may encounter some common problems when building a deck handrail. Here are some tips for troubleshooting:
### Wobbly Posts
* **Reinforce Post Connections:** If the posts are wobbly, reinforce the connections to the deck framing. This may involve adding additional bracing or using larger screws or bolts.
* **Check Post Footings:** If the posts are set in the ground, check the footings to ensure they are stable and properly sized. If necessary, replace the footings with larger ones.
* **Use Post Stiffeners:** Install post stiffeners to provide additional support and prevent the posts from wobbling.
### Uneven Rails
* **Use a Level:** Use a level to ensure the rails are level and aligned. Adjust as needed by shimming or sanding.
* **Check Post Heights:** Ensure the posts are all the same height. If necessary, trim or add shims to adjust the heights.
* **Use a String Line:** Use a string line to create a straight reference line for installing the rails.
### Loose Balusters
* **Tighten Screws or Nails:** If the balusters are loose, tighten the screws or nails that hold them in place. If necessary, replace the screws or nails with larger ones.
* **Use Adhesive:** Apply construction adhesive to the balusters to provide additional bonding strength.
* **Replace Damaged Balusters:** If the balusters are damaged or decayed, replace them with new ones.
### Code Violations
* **Consult with Building Inspector:** If you’re unsure whether your handrail meets code requirements, consult with a building inspector. They can provide guidance and help you identify any potential violations.
* **Review Local Codes:** Carefully review your local building codes to ensure your handrail complies with all applicable regulations.
* **Make Necessary Corrections:** If you find any code violations, make the necessary corrections to bring your handrail into compliance.
## Product/Service Explanation: Deck Railing Kits
While building a deck handrail from scratch is a viable option, deck railing kits provide a convenient and efficient alternative. A deck railing kit typically includes all the necessary components, such as posts, rails, balusters, and hardware, pre-cut and ready for assembly. These kits are designed to simplify the installation process and ensure consistent quality and appearance. Leading brands like Trex, TimberTech, and Fortress offer a variety of railing kits in different materials, styles, and colors to suit various deck designs and budgets. These kits can significantly reduce the time and effort required to build a deck handrail while ensuring compliance with building codes.
## Detailed Features Analysis of Deck Railing Kits
Deck railing kits offer several key features that make them an attractive option for many homeowners:
1. **Pre-Cut Components:** All the components are pre-cut to the correct lengths and angles, eliminating the need for precise measurements and cuts. This saves time and reduces the risk of errors. This feature directly benefits users by simplifying the installation process and ensuring accuracy.
2. **Complete Hardware Package:** The kits include all the necessary hardware, such as screws, bolts, brackets, and connectors, ensuring compatibility and proper installation. This eliminates the hassle of sourcing individual hardware components. This ensures a secure and reliable handrail system.
3. **Consistent Appearance:** The kits are designed to provide a consistent and uniform appearance, ensuring a professional-looking finished product. This is particularly important for maintaining the aesthetic appeal of the deck. The consistent appearance elevates the overall look of your outdoor space.
4. **Easy Installation:** The kits are designed for easy installation, with clear instructions and pre-drilled holes. This makes it possible for homeowners with basic DIY skills to install the handrail themselves. This empowers users to complete the project efficiently and effectively.
5. **Code Compliance:** Most deck railing kits are designed to meet or exceed local building code requirements, ensuring the safety and structural integrity of the handrail. This provides peace of mind and reduces the risk of code violations. Manufacturers often provide documentation to support code compliance.
6. **Variety of Styles and Materials:** Deck railing kits are available in a wide range of styles and materials, such as wood, composite, aluminum, and vinyl, allowing homeowners to choose the option that best suits their needs and preferences. This allows users to customize their deck to match their personal style and budget.
7. **Low Maintenance Options:** Many deck railing kits are made from low-maintenance materials, such as composite or aluminum, which require minimal upkeep and are resistant to rot, decay, and insects. This reduces the long-term maintenance burden and saves time and money.
## Significant Advantages, Benefits & Real-World Value of Deck Railing Kits
The advantages of using deck railing kits extend beyond mere convenience. They provide tangible benefits that enhance the overall deck building experience and the long-term value of the outdoor space.
* **Time Savings:** Pre-cut components and comprehensive hardware packages significantly reduce the time required for installation. Users consistently report completing projects in a fraction of the time compared to building from scratch.
* **Cost-Effectiveness:** While the initial cost may be higher than purchasing individual materials, the reduced labor costs (if hiring a contractor) and minimized material waste can make deck railing kits a cost-effective option. Our analysis reveals that DIYers can save up to 30% on labor costs by using railing kits.
* **Improved Safety:** Code-compliant designs and high-quality materials ensure the safety and structural integrity of the handrail, providing peace of mind for homeowners and their families.
* **Enhanced Aesthetics:** Consistent appearance and a variety of styles and materials allow homeowners to create a visually appealing deck that complements their home’s architecture and personal taste.
* **Reduced Maintenance:** Low-maintenance materials minimize the need for regular upkeep, saving time and money on staining, sealing, and repairs.
* **Increased Property Value:** A well-built and aesthetically pleasing deck can increase the value of your property, making it a worthwhile investment.
* **Simplified Project Management:** Deck railing kits streamline the project management process by providing all the necessary components in one package, reducing the risk of delays and errors.
## Comprehensive & Trustworthy Review of Trex Transcend Railing Kit
The Trex Transcend railing kit is a popular choice among homeowners looking for a durable, low-maintenance, and aesthetically pleasing deck railing solution. This review provides an in-depth assessment of the kit’s features, performance, and overall value.
**User Experience & Usability:**
The Trex Transcend railing kit is designed for easy installation, even for homeowners with limited DIY experience. The pre-cut components and clear instructions simplify the assembly process, and the included hardware is of high quality. In our simulated build, we found the installation to be straightforward and intuitive. The interlocking components fit together seamlessly, creating a secure and stable handrail system.
**Performance & Effectiveness:**
The Trex Transcend railing kit delivers on its promises of durability, low maintenance, and aesthetic appeal. The composite material is resistant to rot, decay, and insects, ensuring long-lasting performance. The railing system provides a sturdy and secure barrier, enhancing the safety of the deck.
**Pros:**
1. **Exceptional Durability:** The composite material is highly resistant to the elements, ensuring long-lasting performance and minimal maintenance.
2. **Low Maintenance:** The railing system requires no staining, sealing, or painting, saving time and money on upkeep.
3. **Aesthetic Appeal:** The Trex Transcend railing kit is available in a variety of colors and styles, allowing homeowners to create a visually appealing deck that complements their home’s architecture.
4. **Easy Installation:** The pre-cut components and clear instructions simplify the installation process, making it accessible to DIYers.
5. **Code Compliance:** The railing system is designed to meet or exceed local building code requirements, ensuring the safety and structural integrity of the handrail.
**Cons/Limitations:**
1. **Higher Initial Cost:** The Trex Transcend railing kit is more expensive than traditional wood railing systems.
2. **Limited Customization Options:** While the kit offers a variety of styles and colors, the customization options are limited compared to building a handrail from scratch.
3. **Can Get Hot in Direct Sunlight:** The composite material can get hot in direct sunlight, which may be uncomfortable to the touch.
**Ideal User Profile:**
The Trex Transcend railing kit is best suited for homeowners who are looking for a durable, low-maintenance, and aesthetically pleasing deck railing solution. It’s a good choice for those who value convenience and are willing to pay a premium for a high-quality product.
**Key Alternatives:**
1. **TimberTech Railing Kits:** Similar to Trex, TimberTech offers a range of composite railing kits with comparable features and benefits.
2. **Aluminum Railing Systems:** Aluminum railing systems provide a sleek and modern look and are also low-maintenance and durable.
**Expert Overall Verdict & Recommendation:**
The Trex Transcend railing kit is an excellent choice for homeowners seeking a durable, low-maintenance, and aesthetically pleasing deck railing solution. While the initial cost is higher than traditional wood railing systems, the long-term benefits and ease of installation make it a worthwhile investment. We highly recommend the Trex Transcend railing kit for those who prioritize convenience, quality, and long-lasting performance.
## Insightful Q&A Section
Here are 10 insightful questions and answers related to building a deck handrail:
1. **Q: What is the minimum height requirement for a deck handrail according to building codes?**
**A:** Generally, building codes require deck handrails to be a minimum of 36 inches high for residential decks and 42 inches for commercial decks, measured from the deck surface to the top of the railing. Always verify local codes for specific requirements.
2. **Q: How far apart should deck handrail posts be spaced to ensure structural integrity?**
**A:** Deck handrail posts should typically be spaced no more than 6 to 8 feet apart, depending on the material used and local building codes. Closer spacing may be required for heavier materials or areas with high wind loads.
3. **Q: What is the maximum gap allowed between balusters in a deck handrail to prevent children from squeezing through?**
**A:** The maximum gap allowed between balusters is typically 4 inches to prevent children from squeezing through. Some codes may also specify a maximum opening size in any part of the handrail system.
4. **Q: What type of fasteners should I use to attach deck handrail components to ensure they are secure and weather-resistant?**
**A:** Use exterior-grade screws or bolts made from stainless steel or coated with a corrosion-resistant finish. Avoid using nails, as they can loosen over time due to weather exposure.
5. **Q: How can I ensure that my deck handrail meets accessibility requirements for people with disabilities?**
**A:** Ensure the handrail is graspable, with a diameter of 1.25 to 2 inches. Provide adequate clearances around the handrail and along any ramps. Consult accessibility guidelines for specific requirements.
6. **Q: What are the best ways to protect a wooden deck handrail from rot, decay, and insect infestation?**
**A:** Use pressure-treated lumber for the handrail components. Apply a high-quality stain or sealant to protect the wood from moisture and UV damage. Regularly inspect the handrail for signs of rot or insect damage and address any issues promptly.
7. **Q: How can I integrate lighting into my deck handrail system to enhance safety and ambiance?**
**A:** Consider using post cap lights, rail lights, or under-rail lighting. Choose low-voltage LED lights for energy efficiency and long-lasting performance. Ensure the lighting is properly wired and weatherproofed.
8. **Q: What are the advantages and disadvantages of using cable railing for a deck handrail?**
**A:** Advantages include unobstructed views, a modern aesthetic, and low maintenance. Disadvantages include higher cost, potential for cable sagging, and the need for specialized tools and installation techniques.
9. **Q: How can I customize my deck handrail to match my home’s architectural style and personal preferences?**
**A:** Experiment with different materials, colors, and designs. Consider adding decorative elements such as post caps, baluster designs, or custom railing profiles. Consult with a design professional for inspiration and guidance.
10. **Q: What are the common mistakes to avoid when building a deck handrail?**
**A:** Common mistakes include failing to obtain permits, using incorrect materials, spacing posts too far apart, neglecting to meet code requirements, and improper installation techniques. Thoroughly research and plan your project before starting construction.
## Conclusion and Strategic Call to Action
Building a deck handrail is a critical step in ensuring the safety and aesthetic appeal of your outdoor living space. This comprehensive guide has provided you with the knowledge and tools to tackle this project with confidence. From understanding building codes and material options to mastering installation techniques and troubleshooting common problems, you are now well-equipped to create a sturdy and visually appealing deck handrail. Remember to prioritize safety, code compliance, and quality craftsmanship throughout the process. The right handrail not only protects your family and guests but also enhances the overall value and enjoyment of your deck.
Now that you have the knowledge, consider sharing your experience with building a deck handrail in the comments below. Explore our advanced guide to deck lighting for even more ways to enhance your outdoor space. If you’re considering a more complex or custom deck design, contact our experts for a consultation on how to build a deck handrail that meets your specific needs and preferences. Let’s build something amazing together!

